What is CS:GO Counter Strafe and How to Do It [Tutorial]
Introduction
Talking about the shooting, it turns out that many gamers, especially beginners, underestimate the fact or do not know at all that shooting and movement mechanics in Counter Strike are closely related. These topics are very often raised by visitors of the arena, on which I play.
Some dude just starts to whine in the voice chat about having had his crosshair perfectly positioned on the enemy's head and missing the target by some incredible chance. And that guy starts to blame the tickrate, alleged choke, large ping, Gabe himself, or the opponent and, of course, grieves about the game being cracked and impossible to play at all.
With a tool to generate CS:GO crosshair, you can create a custom crosshair that matches your playing style.
Yes, such things also happen, but rather rarely. There is no way they occur each round such people shed crocodile tears about it. In these situations, with a probability of 99% the players themselves are the ones to blame, because they either do not counter-strafe at all or do it in a wrong way.
Consider these tips to play better in CS:GO to improve your skills and climb the competitive ladder.
Strafing and Basic Mechanics
What Is Strafing Anyway and How It Works?
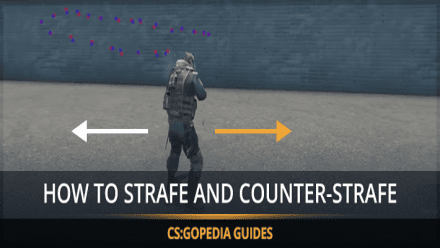
In shooter games, a continuous movement of the player to the right and to the left is called a strafe. Strafing, on the one hand, makes you harder to hit, and on the other hand, allows you to shoot practically on the move. To understand this movement technique with its nuances one needs to delve into the game basic mechanics and their interaction.
We need to open the aim_botz map
Each weapon in the game exhibits its own dispersion rate when used on the go. This applies to shooting when walking and jumping. Some weapons have smaller and some larger dispersion. For a better visualization of the scattering of impact points, you can use a special command:
weapon_debug_spread_show 1
weapon_debug_spread_show 1
You can execute this command only after the sv_cheats 1 command. The point of using this command is that it clearly demonstrates the scope of impact points scatter both during your movement and static shooting. An expanding square shown is nothing but an area of scattering of impact points. That is, each bullet will hit a random point inside the square.
To better see where the bullets hit, you also need to type:
sv_showimpacts 1
sv_showimpacts 1
Indeed, after a few seconds of playing with these commands executed, even the very beginner comes to realize that an inherent dispersion makes a precise shooting when moving and especially when jumping simply impossible. In addition, it becomes obvious that the minimum dispersion rate can only be achieved in a static position.
These shooting tips in CS:GO will help you hit your targets more accurately and consistently.
Great, now all we need is to figure out how to use this knowledge the right way. For this, we need the following command:
cl_showpos 1
cl_showpos 1
This is the default command for displaying the information in the left upper corner about the exact location and orientation of the player model and the crosshair within the coordinate system of the game engine and the current map. In this particular case, what we need is the last parameter, Velocity or simply the speed.
"0" means that you are currently static, and any other value means that you are in motion. We want a minimum dispersion, also we already found out that it is achievable only in a static position, in other words with the "0" speed. If we first press and then release the D button, we will perform a rightward shift.
Now, that is the aspect, which even many experienced players have problems with. The fact is that if you do a simple strafe to the right, that is, first press and then release the D direction button, the game engine will begin to simulate some kind of a model movement inertia, showing a smooth model stop animation, which will take some time.
If you do the shooting at the same time, the engine quite rightly will regard it as a shooting on the go. Though the area of scattering of impact points will contract very quickly as you break, even a tenth of a second is enough for the bullet shot to significantly deviate from the point you intended to hit.
Counter-Strafing
And that is when the so-called counter-strafe mechanics comes to help. Which, if you wish, can also be called an inertia compensation or cancellation of displaying the stop animation for the character model.
The principle of this animation canceling technique is very simple. Its name literally comprises its principle. This infuriating inertia-dash-stop animation can be compensated for-dash-cancelled, call as you like, with a banal movement in the direction opposite to that of the primary movement.
In layman’s terms, the situation is as follows:
If for example, we want to do a rightward micro-counter-strafe and take a shot, in other words, to move quickly to an ultra short distance and stop almost imperceptibly to take a shot with the greatest possible accuracy, we need to do the following:
Press D, release D, then press A and left mouse button at the same time.
If we need to perform middle-distance or long-distance rightward counter-strafe, we need to do the following:
Press D, release D, press А, release А and press the fire button.
Left, forward or backward counter-strafes are done according to the same principle, with a compensation for the initial movement by pressing the button used for moving the character in the opposite direction.
As you could see from the second example, we do not do the movement compensation and the shooting at the same time. This is a very important point. The matter is that when performing medium and long-distance strafes we remain in continuous motion longer and as a result manage to gain a higher speed.
Since the acceleration for counter-strafing and usual movement in Counter Strike is always the same, we can’t have enough counter speed to stop instantly. That means that in case of middle/long-distance strafes, the counter-strafing reduces the stopping time dramatically, but does not allow the model to stop instantaneously. Keep it in your mind.
For the most successful gaming, you have to learn to use counter-strafing at an intuitive level. It's not as simple as it seems, so for the those who do not have much of a self-confidence, I recommend using a type 3 crosshair with a dot.
It does not provide an accurate dispersion visualizer, however it is unnecessary because we want to shoot with maximum accuracy after we stop, and not on the run. This crosshair is more than capable of coping with this task.
Using the best CS:GO maps for aim training can significantly boost your aiming accuracy and reaction time.
Training Your Strafes
As for the training, the game community gives an unconditional preference to the Arena mode. I myself never specifically learned and practiced counter-strafing. It somehow came to my mind after playing on these Arenas for a long time.
By the way, I still play on one of them. I do it quite regularly, so if you want to practice, chat and just run and shoot you can use the link to the server's IP accompanied with the crosshair configuration and the link to the guide. Please, follow the link and give a like to the guide, thus you will help promote the guide to the top and, as a result, attract more new viewers.
